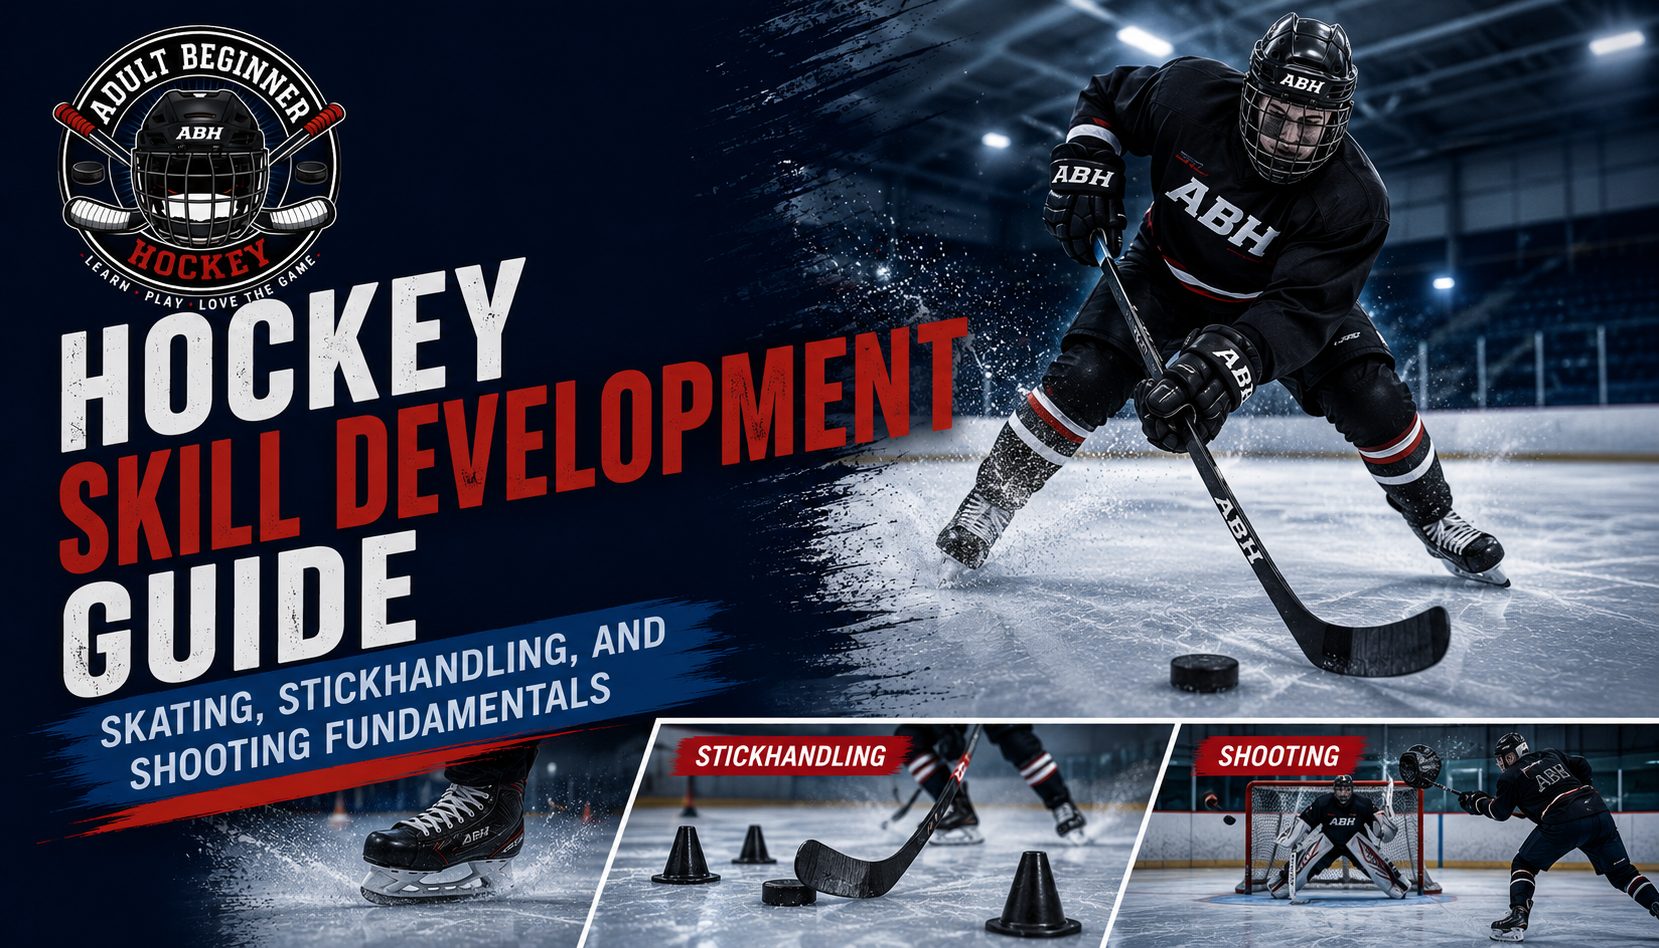
Hockey Skill Development Guide - Skating, Stickhandling, and Shooting Fundamentals
January 27, 2026
Master the fundamental skills you need to succeed in adult hockey — from skating mechanics and stopping techniques to stickhandling, passing, and shooting. Complete breakdowns with practice strategies you can actually use.
Introduction
Starting adult hockey can feel overwhelming with so many skills to learn at once. Unlike learning as a kid, adult players usually want to understand the "why" behind each technique — and that's actually an advantage. This guide breaks down the fundamental skills you need, with practical advice on how to practice and improve each one.
Skating Fundamentals
Skating is the foundation of hockey. No matter how good your hands are, if you can't skate efficiently, you'll struggle to keep up with the game. Everything starts here.
Finding Your Balance
Before you can skate, you need to find your balance on blades. The ready position is fundamental — knees bent, weight centered over the balls of your feet, chest up, stick on the ice. Many beginners make the mistake of standing too upright or leaning back on their heels.
Start by standing at the boards and getting comfortable with the blade underneath you. Modern hockey skates have less ankle support than you'd think, which means your muscles are doing the stabilizing work. That's why your feet and ankles will be sore after your first few sessions. It's normal.
Key points: - Knees bent (athletic stance) - Weight on balls of feet, not heels - Chest up, shoulders back - Arms out slightly for balance - Stick blade on the ice once you have one
Practice drill: Stand at the boards. Lift one skate slightly off the ice and balance on the other. Hold for 10 seconds. Switch feet. This builds the ankle strength you'll need for everything else.
Forward Skating Mechanics
Proper forward skating comes from pushing with the edges of your skates, not the toe picks. Each stride involves a full extension of your pushing leg, weight transfer to your gliding leg, recovery of the pushing leg underneath your body, and repeating on the opposite side.
The power comes from the C-cut motion your blade makes on the ice. Think about pushing outward and backward, not straight back. Keep your knees bent throughout the stride, your chest up, and maintain a slight forward lean from the ankles — not the waist.
Common issues:
| What it looks like | What's causing it |
|---|---|
| Choppy strides | Not fully extending your push leg |
| Skating on toes | Weight too far forward, unstable |
| Stiff legs | Not bending knees enough |
| Looking down | Destroys balance and awareness |
The proper stride sequence: 1. Start with weight on your right leg, left leg extended to the side 2. Push with inside edge of your left skate (C-cut motion) 3. Transfer weight fully to the left leg as it becomes the glide leg 4. Recover your right leg underneath your body 5. Repeat on the right side
Practice drill: Slow, exaggerated strides down the ice. Focus on full extension and weight transfer. Count "push, glide, recover" in your head. Video yourself or ask someone to watch your form — you'll be surprised at what you're actually doing versus what you think you're doing.
Backward Skating Basics
Backward skating uses C-cuts similar to forward skating, but the mechanics feel completely different. Start in a ready position with knees bent and weight on the balls of your feet. Make small C-cuts by pressing the inside edge of one skate into the ice while the other glides.
The key is keeping your chest up and resisting the urge to look down. Use your peripheral vision and quick glances to know what's behind you. Backward crossovers and transitions come later, but solid backward C-cuts are essential for defensive play.
Backward C-cut technique: 1. Feet shoulder-width apart 2. Press inside edge of one foot into ice, make a small C-shape 3. Other foot glides backward 4. Alternate feet in rhythm 5. Chest stays up — don't bend at the waist
Common mistakes: Looking down (balance issue), bending at the waist instead of the knees, too much weight on heels, and taking small quick steps instead of pushing and gliding.
Practice drill: Start at one end, backward C-cuts to the other. Focus on the depth of your knee bend. Keep your chest and head up — look at the scoreboard. Start slow and build speed as you get comfortable.
Crossovers and Turning
Crossovers let you maintain speed through turns. When turning left, your right leg crosses over your left, and vice versa. The outside leg — the one crossing over — provides power while the inside leg pushes underneath.
Keep your inside shoulder and hip dropped toward the center of the circle. Your upper body should lean into the turn while your knees stay bent. Start with wide, slow circles and gradually tighten your turns as you improve.
Forward crossover mechanics (turning left): 1. Circle to the left 2. Right leg lifts and crosses over left leg 3. Left leg pushes with outside edge underneath 4. Lean your entire body into the turn 5. Inside shoulder drops toward center 6. Repeat in rhythm
Key points: Full body leans into the turn, not just upper body. Inside knee stays bent deeply. Outside leg crosses completely over. Inside leg pushes with outside edge. Head and chest face where you're going.
Practice drill: Circle the faceoff dots. Start wide and slow. Gradually make circles tighter. Practice both directions — one will be harder, and that's the one you need to work on most. Focus on smooth, rhythmic motion.
Edge Work Fundamentals
Edge control is what separates good skaters from great ones. Your skate blade has two edges — inside and outside. Learning to use them independently gives you agility and control that you can't get any other way.
Practice simple edge drills: glide on one foot using only the inside edge, then switch to the outside edge. Make S-curves down the ice by shifting your weight between edges. These exercises build ankle strength and develop the muscle memory needed for advanced skating.
Inside edge glides: Glide on one foot, pressure the inside edge, knee bent with ankle tilted. Creates a curved path and develops balance and edge feel.
Outside edge glides: Glide on one foot, pressure the outside edge. Requires more ankle strength and creates the opposite curve. More challenging than inside edge work.
S-curves (slaloms): Glide on both feet, shift weight side to side, pressure alternating edges. Creates an S-pattern down the ice and builds edge control and balance.
Practice drill: Dedicate 10 minutes per session to edge work. Inside edge glides on both feet, outside edge glides on both feet, S-curves at slow speed, then progress to tighter and faster curves.
Stopping Techniques
Learning to stop is crucial for safety and game play. There are multiple techniques, each with different applications.
Snowplow Stop
The snowplow stop is the beginner-friendly method. Toes pointed inward, heels out, pushing the inside edges into the ice. It's not efficient for game situations, but it builds confidence and edge control — and it gives you a way to stop while you learn the hockey stop.
Technique: 1. Start gliding forward slowly 2. Point toes inward (pigeon-toed) 3. Push heels outward 4. Press inside edges into ice 5. Scrape the ice (makes snow)
| Pros | Cons |
|---|---|
| Easy to learn | Slow and inefficient |
| Good for speed control | Not used in games |
| Builds edge awareness | Doesn't work at high speed |
| Safe for beginners | Hard on knees if done wrong |
Practice drill: Glide slowly, snowplow stop. Increase speed gradually. Focus on even pressure on both edges. Build up the distance you can stop in.
Hockey Stop
The hockey stop is the primary stopping method in games. Turn your hips and shoulders perpendicular to your direction of travel while simultaneously turning both feet and applying pressure to your edges. Weight should be balanced between both skates.
Here's what most beginners get wrong — they try to stop with just their feet while leaving their upper body facing forward. The stop comes from your entire body rotating together. Practice stopping on both sides, because one direction will feel more natural at first.
Technique: 1. Glide forward with knees bent 2. Rotate hips and shoulders together 90 degrees 3. Turn both feet simultaneously 4. Apply pressure to edges (front foot on inside edge, back foot on outside edge) 5. Weight balanced between both feet 6. Spray ice
Common mistakes: Rotating only your feet (not your whole body), weight too far forward or back, not enough knee bend, trying to stop too fast before you're ready, and not committing to the turn.
Learning progression: 1. Glide and turn: Practice rotating your body while gliding — don't try to stop yet 2. Gentle scrape: Add light edge pressure to slow down 3. Half stop: Slow down significantly but don't fully stop 4. Full stop: Complete stop with full edge pressure 5. Speed progression: Start slow, gradually increase speed
Practice drill: Blue line to blue line. Skate forward, stop at each blue line. Practice stopping on both sides. Gradually increase speed. Focus on body rotation.
One-Foot Stop
An advanced technique using one foot. Useful for quick changes of direction.
Technique: Glide forward, rotate body 90 degrees, apply pressure with one foot, other foot lifts slightly or drags, balance on the stopping foot.
When to use: Quick pivots, tight space stopping, transitioning to backward skating.
Work on this after you can do solid two-foot hockey stops on both sides.
Stickhandling
Stickhandling is about controlling the puck while maintaining awareness of the ice around you. It's a hand-eye coordination skill, and it improves dramatically with consistent practice.
Grip and Hand Positioning
Your top hand (left hand for right-handed shooters) should grip the top of the stick with a firm but not white-knuckle grip. This hand guides and controls the stick. Your bottom hand — 8-12 inches down the shaft — provides support and power but should stay relatively loose during stickhandling.
Many beginners grip too tightly with both hands. This restricts the stick's movement and tires out your forearms fast. Think of your top hand as steering and your bottom hand as supporting.
Proper grip:
| What it should feel like | |
|---|---|
| Top hand | Firm grip at the very top of the stick — guides and controls |
| Bottom hand | 8–12 inches down shaft, loose and relaxed |
| Blade angle | Controlled with wrist rotation, not arm movement |
| Pressure | Firm enough to control, loose enough to feel the puck |
Hand position check: Hold your stick in front of you. Your bottom hand should be around mid-chest level when the stick blade is on the ice. Adjust to comfort.
Basic Puck Control
Start with the puck directly in front of you, moving it side to side in a smooth rhythm. The puck should move from your forehand side to your backhand side using the full blade of your stick. Keep the puck in contact with your blade — it should roll smoothly across rather than being tapped.
Practice cupping the puck by rolling your wrists so the blade covers it. This protects the puck from stick checks and gives you better control. Your head should be up, using peripheral vision to track the puck.
Side-to-side stickhandling: 1. Puck starts in front of your body 2. Move it to your forehand (right side for righties) 3. Roll wrists to cup the puck 4. Slide to backhand side 5. Roll wrists the other direction 6. Smooth, rhythmic motion 7. Puck stays in contact with the blade
Key points: Wrists do the work, not arms. Bottom hand stays relaxed. Head up — look at the wall, not the puck. Smooth, controlled motion. The puck doesn't leave blade contact.
Stationary Stickhandling Drills
Before you can stickhandle while moving, master it standing still. Here's the progression:
Side-to-side in front: Basic motion. Start slow, build rhythm. Focus on wrist roll.
Figure-eight around feet: Puck goes around and between your feet. Builds hand-eye coordination and challenges both forehand and backhand.
Wide to narrow: Start with wide stickhandling, gradually bring the puck closer to your body. Tests control at different distances.
One-handed (top hand only): Remove your bottom hand. Forces top hand control and builds wrist strength.
Toe drags: Pull the puck back toward yourself using the toe of the blade. Quick, snapping motion.
Practice protocol: 10 minutes daily if possible. Start each session with basic side-to-side, then progress through the drills. Head up — look at the wall, watch TV, read something. Build that muscle memory.
Stickhandling While Skating
Once you're comfortable stickhandling stationary, add movement. Start skating slowly while moving the puck side to side. The puck should move in rhythm with your skating stride — as your right foot pushes, the puck can move to your backhand side, and vice versa.
Don't look down at the puck. Trust your hands and use peripheral vision. In games, you need to see passing lanes, defenders, and the net — not your stick.
Skating + stickhandling progression:
Slow skating, wide stickhandling: Glide slowly with wide puck movement. Build comfort.
Increase speed: Skate faster gradually. Maintain control. Don't sacrifice form for speed.
Tighter puck control: Bring the puck closer to your body. Quicker touches. More game-like.
Head up progression: Start by glancing up occasionally. Progress to mostly up with occasional glances down. Eventually almost entirely peripheral vision.
Practice drill: End to end with the puck. Start slow with wide stickhandling. Each lap, increase one element — speed OR tightness OR head up. Don't try to increase everything at once.
Off-Ice Stickhandling Practice
You don't need ice to improve your hands. Use a street puck or stickhandling ball on concrete or tile floors and practice the same drills. Off-ice stickhandling actually builds better habits because the increased friction forces you to use proper technique.
Consider a weighted puck or stickhandling aids for building strength and control. Ten minutes of daily off-ice stickhandling will dramatically improve your on-ice performance. You can practice while watching TV — it's one of the easiest ways to get better without going to the rink.
Passing
Hockey is a team game, and passing moves the puck more efficiently than skating with it.
Forehand and Backhand Passes
A proper forehand pass starts with the puck on your forehand side, slightly behind your body. Sweep the puck forward, rolling your wrists to cup it against the blade, then release toward your target. Follow through with your blade pointing where you want the puck to go.
Weight transfer is crucial — shift from your back foot to your front foot as you pass. This adds power and accuracy. The puck should roll smoothly off your blade, not slide.
Backhand passes use the same principle but feel more awkward initially. Keep your bottom hand loose and roll your wrists to cup the puck. Most beginners struggle with backhand passing because they don't rotate their wrists enough.
Forehand pass technique: 1. Puck on forehand side, slightly behind body 2. Cup puck with blade (roll wrists) 3. Sweep forward in smooth motion 4. Transfer weight from back foot to front 5. Release puck toward target 6. Follow through — blade points at target
Backhand pass technique: 1. Puck on backhand side 2. Cup puck (roll wrists significantly) 3. Bottom hand very loose 4. Sweep forward 5. Weight transfer 6. Follow through pointing at target
Key points: Smooth sweep, not a slap or tap. The puck rolls off the blade. Weight transfer adds power. Follow-through adds accuracy. Adjust power to distance — don't overshoot short passes.
Receiving Passes
Receiving is just as important as passing. Present a target with your blade on the ice, perpendicular to the passer. As the puck arrives, cushion it by giving slightly with your blade — think of catching an egg without breaking it.
If the pass is too far ahead or behind you, move your feet to get into position rather than overreaching with your stick. A pass received properly will settle on your blade, ready to shoot or pass immediately.
Receiving technique: 1. Blade on ice, perpendicular to pass direction 2. Watch the puck onto your blade 3. As puck makes contact, "give" slightly (cushion) 4. Puck should settle on blade, not bounce off 5. Immediately ready to shoot or pass
Common mistakes: Blade in the air (puck bounces off), blade parallel to pass (puck slides past), blade too stiff (puck bounces away), and not moving your feet to get to the pass.
Practice drill: Partner passing. Start close — about 10 feet apart. Gradually increase distance. Focus on receiving, not just passing. Call for passes with "Here!" or a stick tap.
Saucer Passes
Saucer passes lift the puck over sticks and skates to reach a teammate. Use a similar motion to a forehand pass but add an upward component. Snap your wrists quickly and elevate your follow-through.
The puck should rotate flat like a flying saucer — hence the name — and land flat on your teammate's blade. This takes significant practice. Start with short saucers and gradually increase distance.
Technique: 1. Start like a forehand pass 2. Add upward component to blade angle 3. Quick wrist snap 4. Elevate your follow-through 5. Puck rotates flat (like a frisbee) 6. Lands flat on ice or teammate's blade
When to use: Over a defender's stick, over skates in traffic, passing through multiple layers, and breakout passes in some situations.
Common Passing Mistakes
Beginners often pass too hard, making the puck difficult to receive. A pass to a stationary teammate 10 feet away doesn't need the same velocity as a breakout pass across the ice.
Other mistakes to avoid:
Not looking before passing — Always know where your target is. Look before making the pass. Don't telegraph by staring too long.
Passing to covered players — Pass to space, not to stationary covered teammates. Lead them into open ice. Anticipate where they'll be.
Blade in the air when receiving — Keep your blade on the ice. The puck can't be received in the air.
Telegraphing passes — Don't stare at your target. Look, then pass quickly. Defenders read your eyes.
Practice drill: Wall passing (bounce passes off the boards), partner passing with movement, triangle passing (3 people), and varying distance and speed.
Shooting
Shooting is the most glamorous skill, but it requires proper mechanics to be effective. Accuracy beats power every time.
Wrist Shot Mechanics
The wrist shot is hockey's most versatile shot. Start with the puck near your back foot. Transfer your weight forward while sweeping the puck toward the net. As the puck reaches the middle of your stance, snap your wrists forward and follow through toward your target.
The power comes from three sources: 1. Weight transfer from back to front 2. Flex in your stick shaft (bending then releasing) 3. Wrist snap at release
Your bottom hand pulls down and back while your top hand pushes forward, creating a lever action that flexes the stick. The blade should stay in contact with the ice until the release point. Follow through with your blade pointing at your target — finish high for high shots, low for shots along the ice.
Starting position: Puck near back foot, weight on back leg, knees bent, hands positioned normally on stick.
The sweep: Begin transferring weight forward. Sweep puck toward front foot. Blade stays in contact with ice. Stick shaft begins to flex.
The release: Puck reaches middle of stance. Snap wrists forward and roll them over. Bottom hand pulls down and back. Top hand pushes forward. Stick flexes then releases. Puck leaves blade.
Follow through: Blade points at target. Weight fully on front foot. Arms extended toward target. Height of follow-through determines shot height.
Snap Shot
A snap shot is a quick-release version of the wrist shot. There's minimal windup — the puck starts closer to your front foot. Focus on a quick, powerful wrist snap and stick flex rather than a long sweeping motion.
The snap shot sacrifices some power for speed of release. It's ideal when you have limited time or space, which is most game situations.
Snap shot technique: 1. Puck starts near middle of stance, not back foot 2. Minimal wind-up 3. Quick weight transfer 4. Snap wrists hard and fast 5. Stick flexes rapidly 6. Quick release 7. Follow through (shorter than wrist shot)
When to use: Quick shooting opportunities, limited space, defender closing in, and as a one-timer alternative.
Less power but faster release than a wrist shot. Less telegraphed too. More common in games than you'd think.
Slap Shot Basics
Slap shots look impressive but are less practical than wrist shots for most game situations. Start with your hands farther apart on the stick. Wind up by bringing the stick back to shoulder height or higher.
Swing down and strike the ice 2-3 inches behind the puck. The stick flexes against the ice, then the blade contacts the puck, releasing the stored energy. Follow through toward your target.
Slap shots require significant stick flex and timing. They're also slow to execute and easier for goalies to read. Focus on wrist shots first — add slap shots once you're comfortable with other shooting techniques.
Challenges: Requires a very stiff stick or strong player to flex properly. Slow to execute with a big telegraph. Less accurate than wrist shots. Harder to control height. Easy for goalies to read.
When it's useful: Point shots on the power play, wide open shots from distance, clearing the zone, and psychological impact.
For beginners — focus on wrist shots and snap shots first. Slap shots are rarely used in modern hockey compared to past eras.
Backhand Shots
Backhand shots use similar mechanics to forehand shots but feel less natural. Start with the puck on your backhand side. Keep your bottom hand loose for full wrist rotation. Transfer your weight and snap your wrists through the shot.
Most players' backhand shots are significantly weaker than their forehand. This makes them somewhat unpredictable for goalies, which is actually an advantage. Practice backhands regularly — they're useful in tight situations around the net.
| Why it's harder | Why you should practice it |
|---|---|
| Less natural wrist motion | Useful around the net |
| Bottom hand works the opposite direction | Goalies sometimes struggle with it |
| Less power generation | Doubles your shooting options |
| It feels awkward initially | Offers quick release in tight spaces |
Accuracy vs. Power
Beginners often focus on shooting hard rather than shooting accurately. A 60 mph shot that misses the net is worthless. A 40 mph shot that hits the corner scores goals.
Practice shooting at specific targets — water bottles, small nets, marked zones. Start slow, focusing on hitting your target consistently. Speed comes naturally as your mechanics improve.
In games, most goals come from quick releases and good positioning, not the hardest shot on the ice.
Practice priorities: 1. Accuracy first: Hit the net consistently 2. Target practice: Aim for specific spots 3. Quick release: A faster release beats a harder shot 4. Then power: Add velocity once you're accurate
Practice drill: Set up targets — bottles, cones, tape marks. Shoot 20 shots at each target. Track your accuracy percentage. Don't increase power until you're hitting 70%+ of your target.
Common Mistakes to Avoid
Skates Too Big or Poorly Fitted
Skates should fit snugly with minimal heel lift and your toes barely touching the toe cap. Many beginners buy skates too large, thinking they need room or that they'll break in. Poorly fitted skates make learning to skate exponentially harder and can cause blisters and foot pain.
Get your feet measured properly and try on multiple brands. Different manufacturers fit differently. Your skates should feel tight when new — they'll mold to your feet over time.
Signs of poor fit: Heel lifting when you bend knees, toes crunched at the end, pain or hot spots, excessive slipping side to side, and blisters after every skate.
Check out my Essential Hockey Gear Guide for detailed skate fitting information.
Looking Down at Your Feet or Puck
Staring at the puck, your feet, or the ice might feel safer, but it destroys your awareness. Hockey is a fast game played with your head up. You need to see teammates, opponents, and open ice.
Consciously practice with your head up, even when it feels uncomfortable. Use peripheral vision for the puck and your feet. The discomfort is temporary — the habit lasts.
How to fix: Practice stickhandling while looking at the wall. Force yourself to look up during drills. Have someone call out numbers or words while you handle the puck. Build trust in your peripheral vision.
Not Bending Your Knees
Standing upright with straight legs is the most common skating error. Every fundamental skill — skating, stopping, turning, shooting — requires bent knees and a low center of gravity.
Your knees should be bent enough that you can barely see your toes when looking down (though you shouldn't be looking down). This athletic position gives you balance, power, and mobility. Your legs will burn at first, but this is the only way to skate properly.
How to fix: Conscious focus on knee bend. Squat and hold the position off-ice to build strength. Have someone video your skating. Think "sitting in a chair" position.
Rushing Progression
Adult learners often want to advance quickly to keep up with more experienced players. This leads to skipping fundamentals and developing bad habits that are hard to break later.
Master each skill at slow speeds before adding complexity. If you can't stickhandle while skating slowly with your head up, you're not ready to do it at game speed. Build a solid foundation — the progression will come faster than you think.
Proper progression: Master basics slowly. Add one element at a time — speed OR complexity, not both. Be patient with the process. Focus on technique over flash.
Practice Strategies
Structured Practice Sessions
Sample 60-minute ice session:
| Block | Time | What you're doing |
|---|---|---|
| Warm-up | 10 minutes | Free skate to loosen up. Forward and backward skating. Crossovers both directions. Light stickhandling |
| Skill focus | 20 minutes | Choose one skill to focus on. Dedicate time to deliberate practice. Examples — stopping, edge work, stickhandling |
| Application | 20 minutes | Combine skills. Small area games. Scrimmage situations. Apply what you practiced |
| Cool down | 10 minutes | Easy skating. Shooting practice. Stretch on ice |
Deliberate Practice Principles
Quality over quantity. 30 minutes of focused practice beats 2 hours of mindless skating. Have a plan for each session. Work on specific weaknesses. Get feedback through video, coaching, or peers.
Progressive overload. Start easy, gradually increase difficulty. Master before moving on. Don't plateau — always push slightly beyond your comfort zone.
Solo Practice Ideas
When you're alone at stick-and-puck:
Skating drills: Figure-8s around faceoff dots. Tight turns around cones. Backward skating lengths. Edge work and balance drills.
Stickhandling: Stationary stickhandling routine. Skating with puck at various speeds. Through cones or obstacles. One-handed drills.
Shooting: Target practice. Different shot types. Various angles. Quick release focus.
Finding Accountability
Stay motivated: Practice with a partner for mutual accountability. Set specific, measurable goals. Track progress with a journal or video. Join clinics or classes. Hire a coach for occasional check-ins.
Off-Ice Training
Skating-Specific Exercises
Balance and stability: Single-leg balance exercises, Bosu ball training, single-leg squats, and wobble board work.
Skating muscles: Lateral lunges, single-leg deadlifts, Bulgarian split squats, slide board training, and roller blading.
Endurance: Cycling (similar muscles), stair climbing, interval training, and jump rope.
Strength and Conditioning
Lower body focus: Squats (goblet, back, front), lunges (forward, lateral, reverse), deadlifts, leg press, and calf raises.
Core strength: Planks (front and side), anti-rotation exercises, med ball throws, Russian twists, and dead bugs.
Upper body: Push-ups, pull-ups, rows, shoulder work, and rotational movements.
Flexibility and Mobility
Key areas for hockey: Hip flexors (constantly tight from skating), groin and adductors, hamstrings, ankles, and shoulders.
Routine: Dynamic stretching before activity. Static stretching after activity or on off days. Yoga works well for hockey players. Foam rolling. 10-15 minutes daily.
Stickhandling at Home
Setup: Smooth surface, street puck or ball, gloves optional, 10-20 minutes daily.
Routine: Warm up with basic side-to-side. Progress through stationary drills. Add movement if you have the space. Keep your head up. Build hand-eye coordination.
This dramatically improves your on-ice handling, and you can do it while watching TV. Daily practice is possible and it's free — no ice time cost.
Putting It All Together
These fundamental skills don't exist in isolation. Real hockey requires combining them — skating while stickhandling, receiving a pass and shooting in one motion, stopping to change direction while maintaining puck control.
Start by mastering each skill separately, then practice combinations. Join a beginner clinic or league where you can apply these skills in game situations. The transition from drills to gameplay is where everything clicks together.
Everyone progresses at different rates. Some adults are skating confidently after a few months. Others need a year or more. Focus on your own improvement rather than comparing yourself to others.
The beauty of adult hockey is that the learning never stops. Professional players still work on these fundamentals daily. Commit to consistent practice, stay patient with yourself, and enjoy the journey of improving your game.
Key takeaways: - Skating is the foundation — prioritize it - Master basics slowly before adding complexity - Practice deliberately with specific goals - Head up, knees bent — fix those two things and everything improves - Off-ice practice accelerates on-ice development - Be patient — skill development takes time - Enjoy the process
For getting started with hockey, check out my Adult Hockey Getting Started Guide. For equipment information, check out my Essential Hockey Gear Guide.